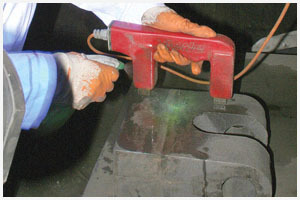
Non Destructive Testing is written in the original language of our language non-destructive testing such as tensile, torsion, mechanical tests can not be applied, based on the integrity of the part is not damaged, the part or material examined on the surface or to detect discontinuity is a kind of examination.
Non-destructive testing, which is a form of inspection without disturbing the integrity of the material, identifies defects and defects on the surface of the material to be inspected.
At the same time, the amount of another material integrated into this material can be measured by this method. Or paint thicknesses on metal surfaces can be determined. Briefly, information about the dynamic and static structures of this material is obtained without damaging the material controlled by non-destructive testing methods.
In addition, non-destructive testing material is used to find capillary cracks, similar defects and defects. There are various methods of non-destructive testing and different non-destructive testing methods are applied according to the type of material to be checked and the type of error sought.
Visual inspection
As the name suggests, in this method, the material is inspected visually and the control is started. It is a very simple method and the control of the discontinuities on the surface of the material to be examined is done by eye. Factors affecting quality, such as structural defects on the surface of a product and the condition of the surface, are examined with a magnifying glass-like instrument or just directly with the eye. In most of the practice standards, visual examination and recording of the findings are recommended first.
Inspection by liquid impregnation
It is a method used for the detection of surface defects. This method is preferred for detecting surface defects of all metallic or non-metallic materials, provided they are not porous. A penetrant liquid is used in this method. The results are evaluated depending on the surface tension and density of the material being checked.
Inspection by eddy currents
This method is suitable for detecting surface and near surface defects. This method can be used in all metals and alloys which have electrical conductivity. Inspection by eddy currents can measure cracks, corrosion, paint or coating thickness on a conductive material and conductivity measurement.
Inspection with magnetic parts
Due to discontinuities in the material being passed over the magnetic materials, changes occur on the current, which makes it possible to detect the problem. Of course, these changes can be observed with the help of special devices, not the eye. The device must be a warning device, such as an indicator, a light indicator or an alarm.
Ultrasonic examination
Ultrasonic examinations are generally performed on steels, metals and alloys. In addition, ultrasonic examination can be performed on wood and composite concrete.
Radiographic examination
It is an extremely effective method for detecting discontinuities on the material to be investigated. The measurement results can be observed with the help of special devices, not with the naked eye.
For more information, you can reach our expert team from our contact addresses and phone numbers and you can get answers to all your questions.